Results 1 to 9 of 9

Thread: Using ice to make mountains

Hybrid View

Previous Post Previous Post   Next Post Next Post
  1. #1
    Guild Novice Alvary's Avatar
    Join Date
    Oct 2009
    Location
    New South Wales, Australia
    Posts
    16

    Tutorial Using ice to make mountains

    Hey there!
    Last time I was mapping (using gimp) I was having a little trouble getting my mountains to lay out well on my maps. This got so frustrating that I put my maps aside for a while. Well, last night I had an idea. As I was testing it out I took some screen shots. I apologize for the terrible quality...my internet is horribly slow and cannot handle uploading large files. This is only very rough, using the ice photo as a base and then applying my normal mountain method to it. (which needs some polishing!) I noticed I had not named my layers while I was working but I do name them here. I hope that does not cause any confusion. Also I am using RobA's city colors palette here as a base. I use it all the time, thank you RobA!
    RobA's tutorial can be found here http://www.cartographersguild.com/sh...gional-RPG-Map and it is very much worth a read!

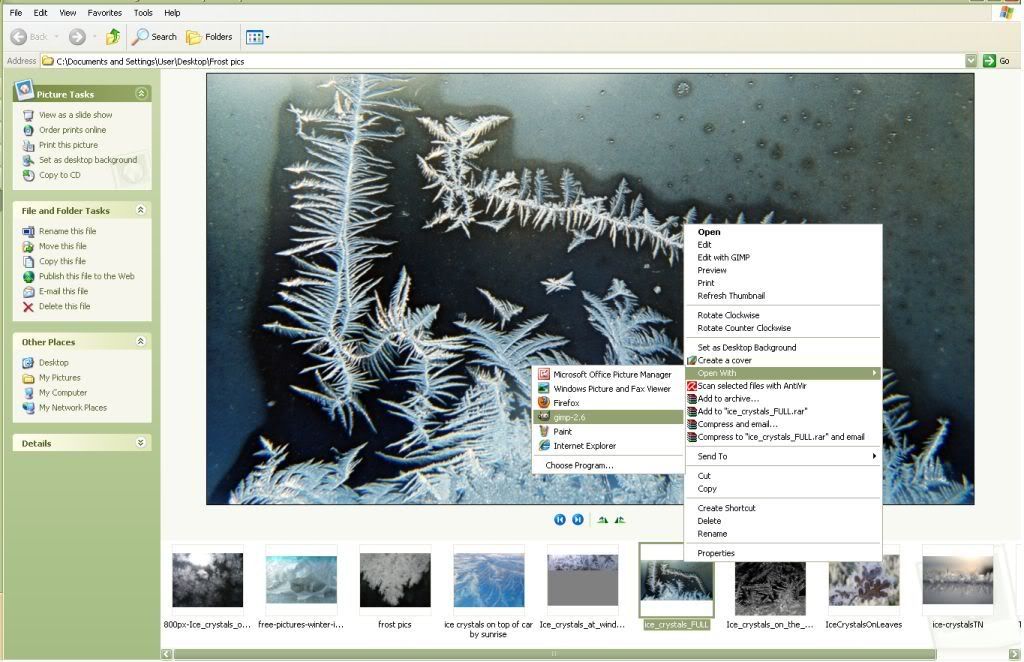
    Search for ice photos or take your own. Save and open in gimp. If you are looking for mountains for a map you have already started it is quite easy to find ice photos with the right shape


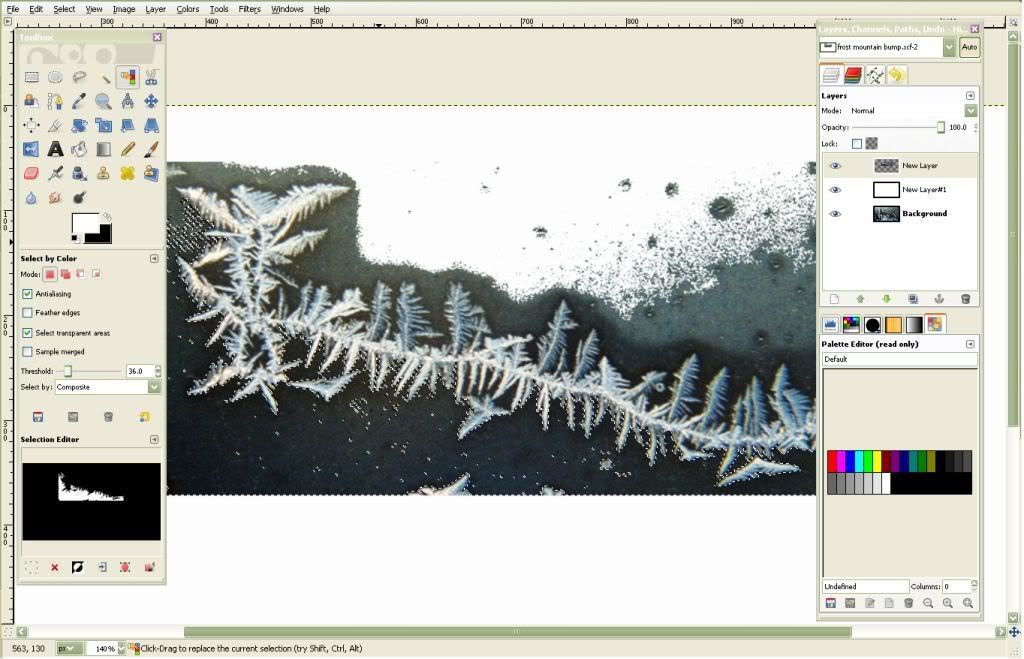
    Do a basic crop, leaving the part of the image you want to use. Using a combination of color select and fuzzy select tool remove the unwanted areas of the image.


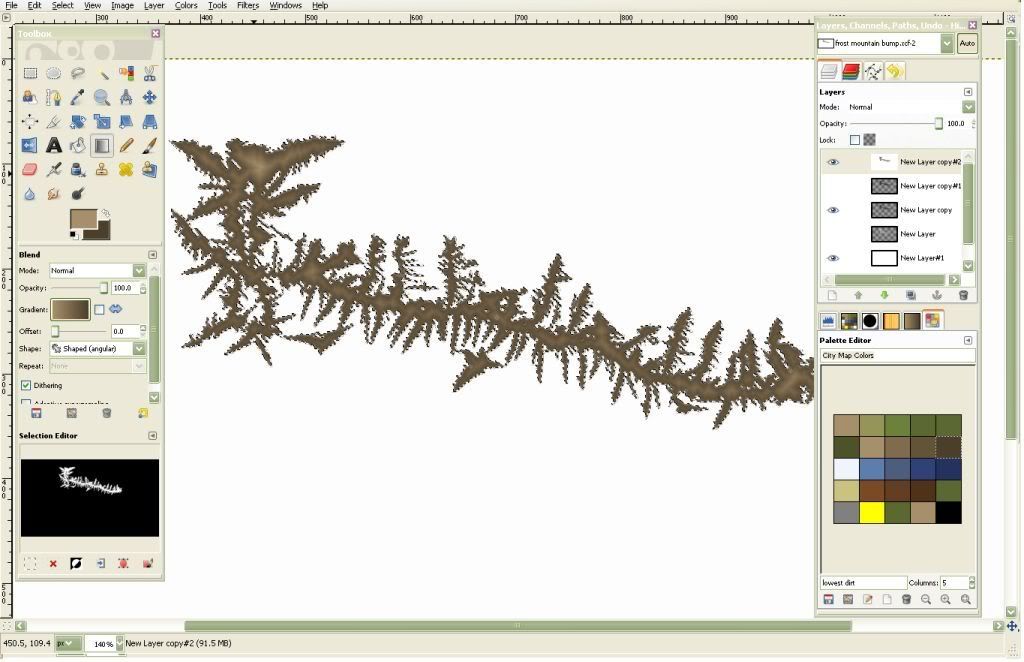
    You should end up with something like this.Clean up the last of the unwanted areas with the eraser. Fuzzy select the blank area, invert selection.


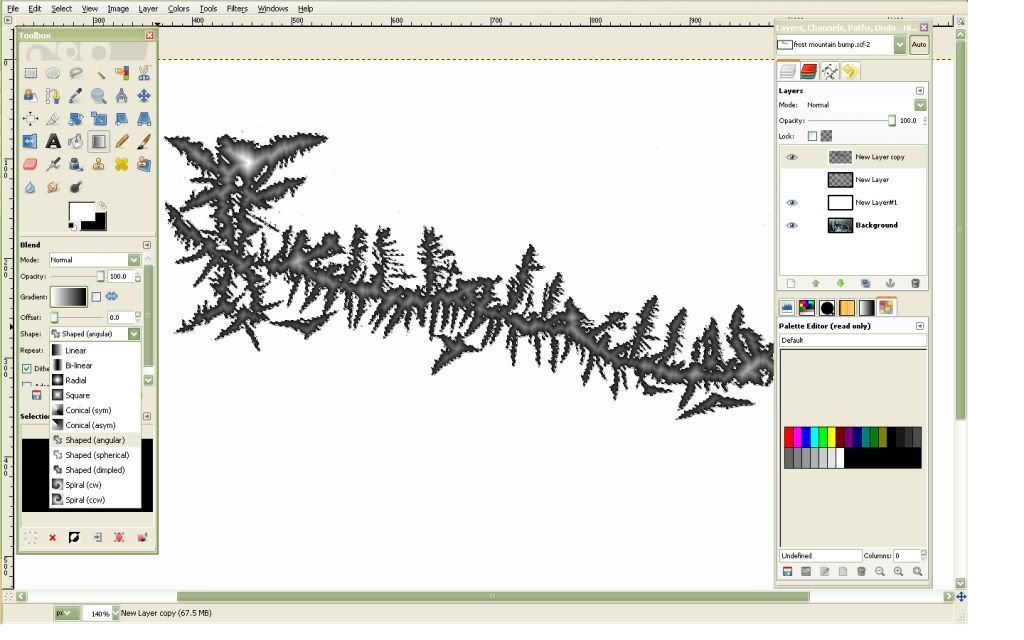
    Create a new layer (transparency) and call it "Mountain backup". With white as your foreground and black as your background, use the blend tool set to "shaped angular" to fill the selection. Duplicate and call the new layer "Mountain bump"


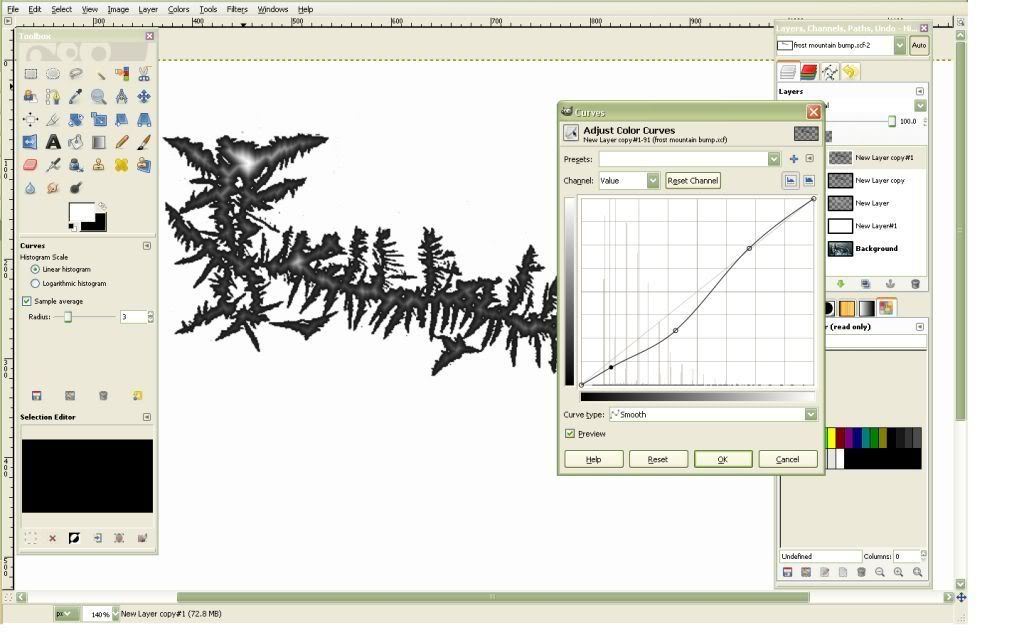
    (On layer "Mountain Bump") Go to colors - curves. I make the curve look somewhat mountain shaped, as this very much reflects in the finished mountains. I was pretty simple with it, feel free to play around. I also went to Colors - brightness and contrast and made a slight adjustment to the brightness, reducing some of the glare from the white. Then go Filters - blur - Gaussian blur. We just want to soften the hard lines here, 5 pixel was plenty on my small image.


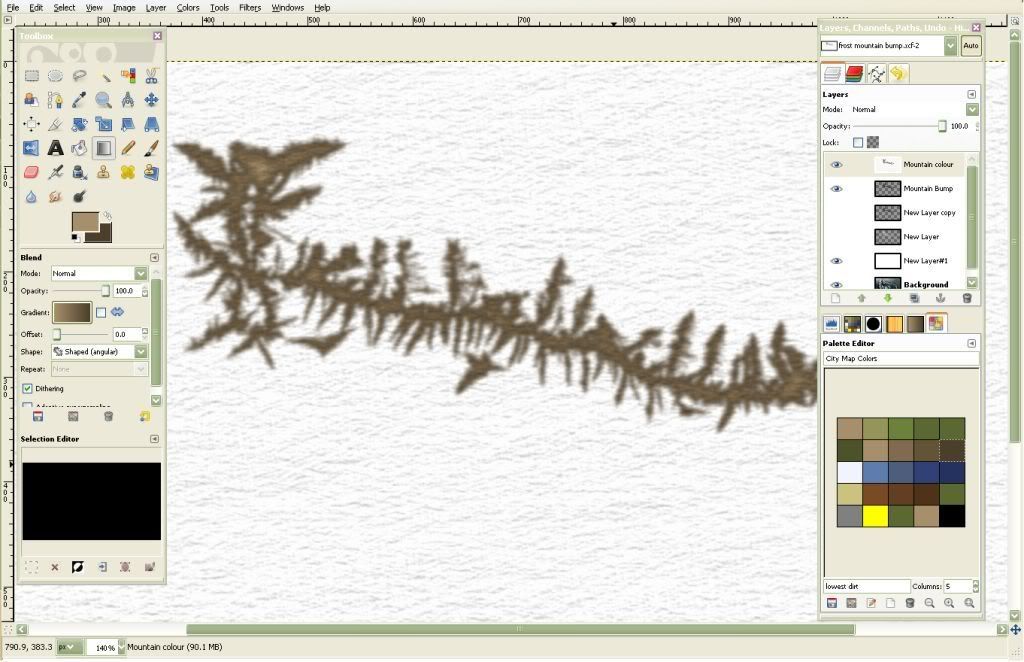
    Go down to "Mountain backup" color select the outside and invert the selection. Create a new layer and call it "Mountain color". Move this layer to the top.
    With a light dirt brown as the foreground and a darker brown/green as the background, fill the selection using Blend tool - shaped angular. Make it a little smoother using the colors - curves and Filters - blur - Gaussian blur like we did with the bump layer. I suggest duplicating this layer in-case you make a mistake and need to start a-fresh.


    I then bumped with a texture I have aside for this sort of thing. I will have to put up another tutorial on making the basic bumps I use a lot. Any fine rocky type texture will do, or leave it out if you wish. Once you have a texture you can apply it by going to Filters - map - bump map, and select the texture base you have made from the drop down menu.


    Now we get to see the whole thing come to life!
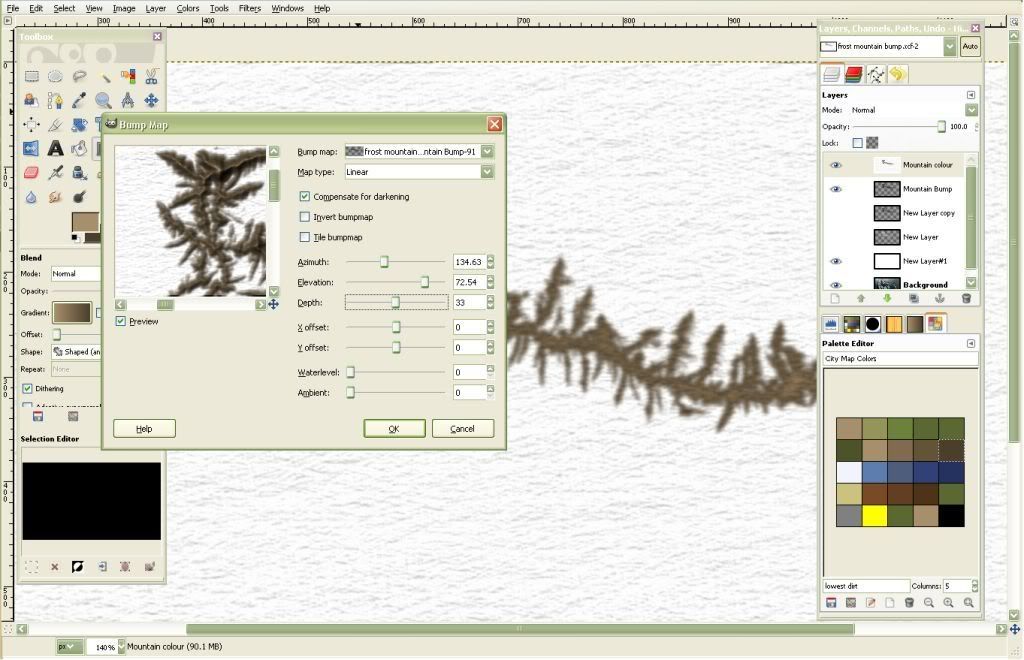
    Select none. On your mountain color layer go to Filters - map - bump map. From the "bump map" drop down menu, select your "Mountain Bump" layer. How you set the sliders is up to you, I personally like to set the elevation quite high and the depth about half way (as you can see in the picture). This helps eliminate the terrible glare you sometimes get on the tops of your mountains if you set both a bit lower.


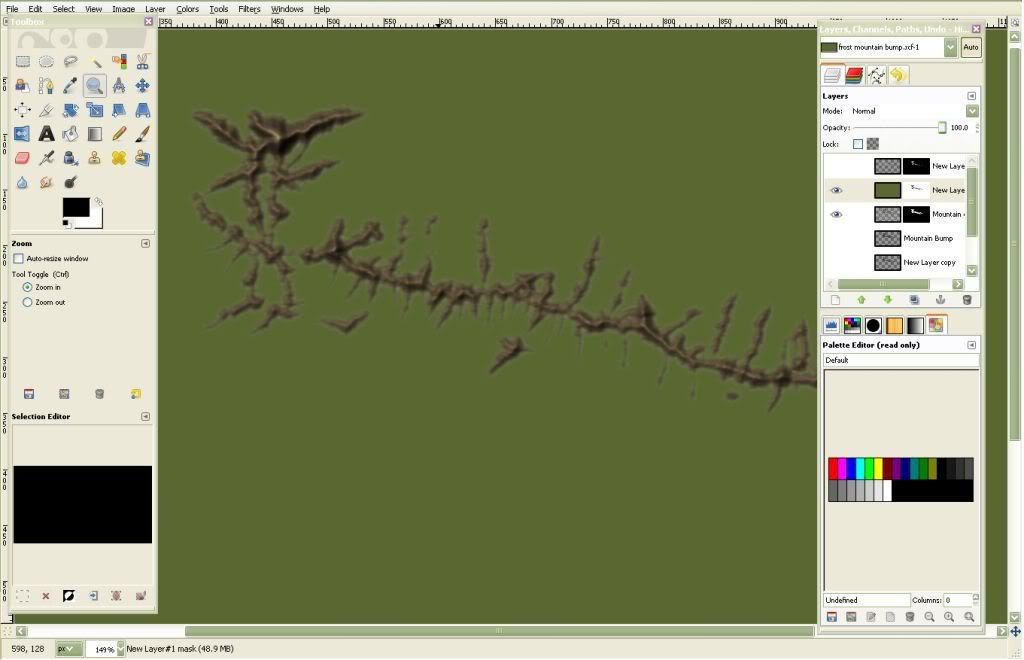
    And there we go, that is the base nicely done! To clean it up a little, go back to your "mountain backup" layer, select the blank area. Go select - grow selection. For this smaller image I grew by 2 pixel. Go back to your mountain color layer and add a layer mask (right clicking the layer in the layers box). On the layer mask, fill the selection with black. Invert selection and fill with white. Go filters - Blur - Gaussian blur. I did a 10 pixel blur. This adds a softness when you are using the mountain layer with other layers.

    This last image needs a little work, but it is 8am and below freezing and I REALLY have to get the fire going before my toes fall off...

    I hope this tutorial was helpful. I certainly found the ice idea to work fantastically...using nature to create nature!
    Alvary

  2. #2
    Community Leader Jaxilon's Avatar
    Join Date
    Nov 2009
    Location
    A beach in Ecuador
    Posts
    5,548

    Default

    What a "COOL" idea, hehe.

    I might try this out one of these days myself.
    “When it’s over and you look in the mirror, did you do the best that you were capable of? If so, the score does not matter. But if you find that you did your best you were capable of, you will find it to your liking.” -John Wooden

    * Rivengard * My Finished Maps * My Challenge Maps * My deviantArt

  3. #3
    Community Leader Facebook Connected Ascension's Avatar
    Join Date
    Jun 2008
    Location
    St. Charles, Missouri, United States
    Posts
    8,392

    Default

    Ingenuity strikes again. That's a great idea, man.
    If the radiance of a thousand suns was to burst at once into the sky, that would be like the splendor of the Mighty One...I am become Death, the Shatterer of worlds.
    -J. Robert Oppenheimer (father of the atom bomb) alluding to The Bhagavad Gita (Chapter 11, Verse 32)


    My Maps ~ My Brushes ~ My Tutorials ~ My Challenge Maps

  4. #4
    Guild Novice Alvary's Avatar
    Join Date
    Oct 2009
    Location
    New South Wales, Australia
    Posts
    16

    Default

    Another quick note...I have found that you can do much the same thing using photos of real large river systems.

    I do find I spend way too much time making mapping easier and not enough making maps...

  5. #5
    Community Leader Facebook Connected Ascension's Avatar
    Join Date
    Jun 2008
    Location
    St. Charles, Missouri, United States
    Posts
    8,392

    Default

    There's a lot of us around here who do the same thing...at least we're trying to make things easier. Usually without much success
    If the radiance of a thousand suns was to burst at once into the sky, that would be like the splendor of the Mighty One...I am become Death, the Shatterer of worlds.
    -J. Robert Oppenheimer (father of the atom bomb) alluding to The Bhagavad Gita (Chapter 11, Verse 32)


    My Maps ~ My Brushes ~ My Tutorials ~ My Challenge Maps

  6. #6
    Community Leader Facebook Connected tilt's Avatar
    Join Date
    May 2010
    Location
    Trelleborg, Sweden
    Posts
    5,787
    Blog Entries
    2

    Default

    very nice idea... and it just goes to show that patterns repeat it self all over and you never know where you'll find your next idea..
    regs tilt
    :: My DnD page Encounter Depot free stuff for your game :: My work page Catapult ::
    :: Finished Maps :: Competion maps - The Island of Dr. Rorshach ::
    :: FREE Tiles - Compasses :: Other Taking a commision - Copyright & Creative Commons ::
    Works under CC licence unless mentioned otherwise

  7. #7
    Community Leader Facebook Connected Steel General's Avatar
    Join Date
    Jun 2008
    Location
    Ft. Wayne, IN
    Posts
    9,530

    Default

    Interesting twist, thanks for sharing.

    I would suggest you might want to compile the whole thing into a single .pdf and post it.
    My Finished Maps | My Challenge Maps | Still poking around occasionally...

    Unless otherwise stated by me in the post, all work is licensed under a Creative Commons Attribution-Noncommercial 3.0 United States License.


  8. #8

  9. #9
    Administrator waldronate's Avatar
    Join Date
    Mar 2007
    Location
    The High Desert
    Posts
    3,604

    Default

    Use one for a fern but stop after three levels, maybe? http://www.cs.unm.edu/~joel/PaperFol...tem-quick.html had a promising start point. At that point it's just a matter of applying a distance transform to the area outside of the fern and inverting it after clipping to a certain level.

    Did I do a Wilbur tutorial on using the outside of river systems to make mountains? I can't remember; things are a little fuzzy lately.
    Last edited by waldronate; 05-19-2010 at 12:39 AM.

Tags for this Thread

Posting Permissions

  • You may not post new threads
  • You may not post replies
  • You may not post attachments
  • You may not edit your posts
  •