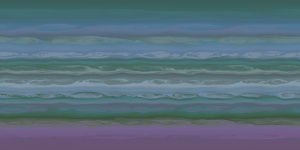
Hello, here is my first tutorial, explains about the creation of Gas Planets in GIMP, since there is no tutorial about Gas Planets for GIMP (only Photoshop) it's very simple, lets get started
1. Create a image of 1700x1700 and 150 of resolution
2. Fill the background with Black
3. Create a new layer and name it "Planet Gradient"
4. Select the gradient you want for your planet (I used a gradient of blue tones) and add it to the "Planet Gradient" layer, and you'll have something like this
1.png
5. Go to Filters -> Distorts -> Ripple
Check Antialiasing, Horizontal, Smear and Sine
Add the next values
Period: 200
Amplitude: 5
Phase shift: 53
You'll have something like this
2.png
6. Now this is the part where you need to be creativesince there's no specifics rules to follow, go to Filters -> Distorts -> IWarp
In this case, I only played with the Move, Grow, Shrink and Swirl (both CW and CCW) controls, you can also adjust the Deform Ratius/Deform Ammount to adjust the effects, If you're not satisfied with the first results, just click Reset and try again
Before use IWarp, I suggest you duplicate the layer
Here's an example of what you should have
3.png
7. This is only optional, in my case I added and seamless rock texture to add some rough aspect to my planet, I used this texture
4.png
Set the layer mode to "Soft Light" and Opacity to 25%, and you'll have this, you can't notice the difference because of the size (423x423)
5.png
8. Now lets spherize the texture, go to Filters -> Distorts -> Apply Lens with Lens refraction index in 1.40
6.png
9. Resize the spherized texture by going to Layer -> Scale Layer, set the Width and Height to 1500
7.png
10. Now lets create a ellipse selection, In the Toolbox click on the Ellipse Select icon, make a small selection in yor layer, then in the Tool Options panel, set Position 500 and 0, and Size 1700 and 1700
11. Without eliminating the ellipse selection, create a new layer and name it "Shadow"
12. Select the "Shadow" layer and fill it with Black, here's what you'll have
8.png
13. Now you can eliminate the ellipse selection by going to Select -> None
14. Keep the "Shadow" layer active, and go to Filters -> Blur -> Gaussian Blur, set Horizontal and Vertical values to 250,0 and Blur Method to RLE
9.png
15. And the final step and also optional, set the "Shadow" layer opacity to 75%, here's a preview
10.png
I hope this tutorial helps you with your work, if you have any question, please let me know and I'll gladly answer, soon I'll post the Nebula tutorial
Have a good day


 Reply With Quote


