Page 16 of 18 FirstFirst ... 612131415161718 LastLast
Results 151 to 160 of 174

Thread: Madness at Gardmore Abbey Encounter Maps

  1. #151
    Guild Artisan Jacktannery's Avatar
    Join Date
    Jun 2011
    Location
    Dublin, Ireland
    Posts
    924

    Default

    This looks great Kennyt - I love your ice effect. Your walls look like they are floating up above the floor to me, due to your perspective shadows, but its still a great map. I'm afraid I don't link up to icestorm, whatever that is.

  2. #152
    Guild Journeyer
    Join Date
    Sep 2013
    Location
    Belgium
    Posts
    107

    Default

    Jack,
    sorry i keep posting my crap here, i should prob start my own thread >.> Yeah wasnt "icestorm" some guy supposed to link up with you and chit chat live - an in person tutorial? i could be reading a post 12 months old though >.< Anyways - IF you ever do somethign like that, i'd love to listen in on it. I am getting a bit more comfortable with GIMP now - here's the second map i've created. The catacombs of Gardmore abbey - course i ran out of room near the top so that chamber is cut short - gotta rework the whole dang thing. It's only two layers at the moment, have not added any objects yet. Any tips on how you filled the walls in with black in your rendition of the catacombs? when i did it, it did not look seamless.
    Catacombs2.jpg


    Did you soften the wall edges on yours? my edges seem to harsh - i've went back through and used the free-cutter tool to make the walls a bit more even, but still fairly sharp.
    Last edited by Kennyt; 02-23-2014 at 07:23 PM.

  3. #153
    Guild Apprentice Facebook Connected
    Join Date
    Jan 2008
    Location
    Lancashire, UK
    Posts
    25

    Default

    That's a nice map Kennyt, especially if you're still getting used to GIMP.

    You can use <Image><Canvas Size> to extend the size of your map, without rescaling the existing image, so you might not need to 'rework the whole thing.'

  4. #154
    Guild Artisan Jacktannery's Avatar
    Join Date
    Jun 2011
    Location
    Dublin, Ireland
    Posts
    924

    Default

    Quote Originally Posted by Kennyt View Post
    Any tips on how you filled the walls in with black in your rendition of the catacombs? when i did it, it did not look seamless.
    Big black paintbush, very fuzzy, and I just painted. Not sure what you mean by seamless.

  5. #155
    Guild Journeyer
    Join Date
    Sep 2013
    Location
    Belgium
    Posts
    107

    Default

    @ Raiko - Thanks for the tips! There are still some GLARING mistakes (poorly meshed wall tiles, color palette a bit off, knife-edged walls, etc) but more improvements incoming! i'll prob switch to another thread so i dont muck up Jack's thread.

    @ Jack - Sweet, i'll give her another go - i tried at 1 am last night but either i am terribad at it or i was just hallucinating; but my first attempts looked exactly like someone scribbled on the walls with a paintbrush and not as natural as yours looked.

    So, generally, when i start adding doors, furniture, items into a map - what's the best way to do it?

    So, for example doors: i cut and paste it, resize it, move it around, get it where i want it. then turn that floater into a layer? then add doors one by one, continuously merging added doors until i have a "door" layer of about 20 or so doors? Then do the same thing with crypts?

    Walls: so is the method I used the "norm" method" ? I create a floor as my base layer, create a second layer as my walls-then start "cutting out" rooms (with a third layer that is just a grid on top to keep myself aligned), revealing the floor beneath. once i have all the rooms cut out, select all, invert, drop shadow.
    Last edited by Kennyt; 02-24-2014 at 06:19 AM.

  6. #156
    Guild Journeyer
    Join Date
    Sep 2013
    Location
    Belgium
    Posts
    107

    Default

    trying to get my craptastic work off your thread :-) moved my on-going project here:
    http://www.cartographersguild.com/du...catacombs.html

  7. #157
    Guild Artisan Jacktannery's Avatar
    Join Date
    Jun 2011
    Location
    Dublin, Ireland
    Posts
    924

    Default

    Quote Originally Posted by Kennyt View Post
    So, generally, when i start adding doors, furniture, items into a map - what's the best way to do it?

    So, for example doors: i cut and paste it, resize it, move it around, get it where i want it. then turn that floater into a layer? then add doors one by one, continuously merging added doors until i have a "door" layer of about 20 or so doors? Then do the same thing with crypts?

    Walls: so is the method I used the "norm" method" ? I create a floor as my base layer, create a second layer as my walls-then start "cutting out" rooms (with a third layer that is just a grid on top to keep myself aligned), revealing the floor beneath. once i have all the rooms cut out, select all, invert, drop shadow.
    That's pretty much exactly how I usually do it, except instead of a drop shadow (I never did get the hang of using that - i probably should try it one of these days) I just duplicate the layer, lock pixels, fill everything with black (this just changes all colours to black because pixels are locked); unlock pixels; blur to c.30% of my ppi value; and place under the primary layer. I would double up this black shadow layer for my walls probably, and maybe reblur the second one.

    I checked out your latest map on your new thread and I think it looks really great.

  8. #158
    Guild Novice Facebook Connected F. Randall Farmer's Avatar
    Join Date
    Feb 2014
    Location
    Palo Alto, California, United States
    Posts
    18

    Praise

    Quote Originally Posted by Jacktannery View Post
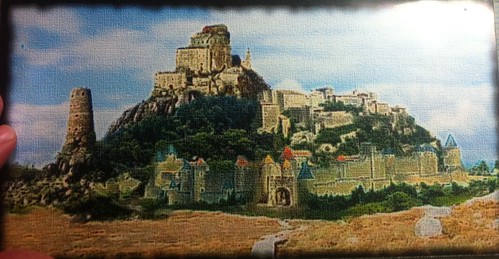
    This is an absolutely terrible photo-montage of the PCs first view of Gardmore Abbey. I had intended to draw it properly but I had no time - the PCs are arriving there tomorrow... - so I copy-pasted a bunch of images from the googleweb and stuck them into a collage to make this franken-thing. I used a cartoonify filter to disguise its awfulness but it just made it worse.


    (I already posted this on the Welcome board, but thought I should post it here -in context- for posterity.)

    I love this map and used it in my Gardmore Abbey run- adventure log posted at: https://the-forsite-irregulars.obsid...e-before-chaos

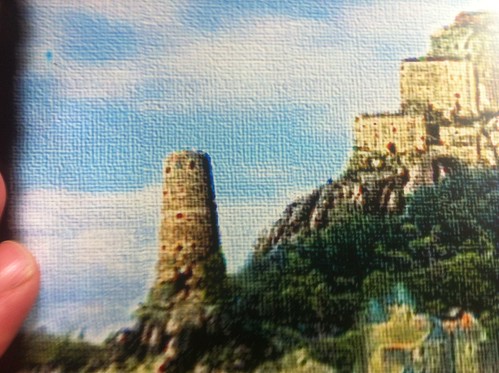
    I turned it into a painting that hung in Wrafton's Inn in Winterhaven. Here's my heavily photoshop-filtered version:


    Saturated the colors to look more like paint, fuzzed it up a bit, dirtied up the corners, added canvas grain, and eventually printed it 5x10" paper to use as a reference during sessions...


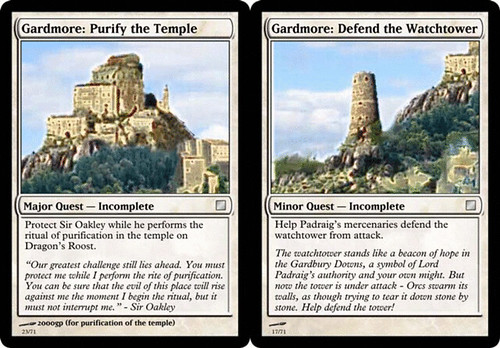
    I also used this image on the quest-cards...


    and that tower image inspired my watchtower build...


  9. #159
    Guild Artisan Jacktannery's Avatar
    Join Date
    Jun 2011
    Location
    Dublin, Ireland
    Posts
    924

    Default

    Wow - my frankenthing really does look very good by the time you finished with it! Great job. It's great to see it used in such a wonderful way. I'm a huge fan of handouts. Thanks for posting up these images.

  10. #160
    Guild Journeyer
    Join Date
    Sep 2013
    Location
    Belgium
    Posts
    107

    Default

    Jack!


    Working on the old Minotaur temple of gardmore - map is a bit bigger than the other so i am splitting it into two parts. I've come to the red and blue checkerboard arena portion and was wondering if you could give me some tips on how you colored those squares? here is my 2nd map so far. yours are still much "cleaner" than mine but hopefully the more i do, the better i'll get :-)

    Temple4.jpg

    Kept playing with it and this is what i came up with - i still like your map better - i dig the floor texture in yours.

    Temple4.jpg
    Last edited by Kennyt; 03-05-2014 at 06:00 PM.

Page 16 of 18 FirstFirst ... 612131415161718 LastLast

Posting Permissions

  • You may not post new threads
  • You may not post replies
  • You may not post attachments
  • You may not edit your posts
  •